


How to Install
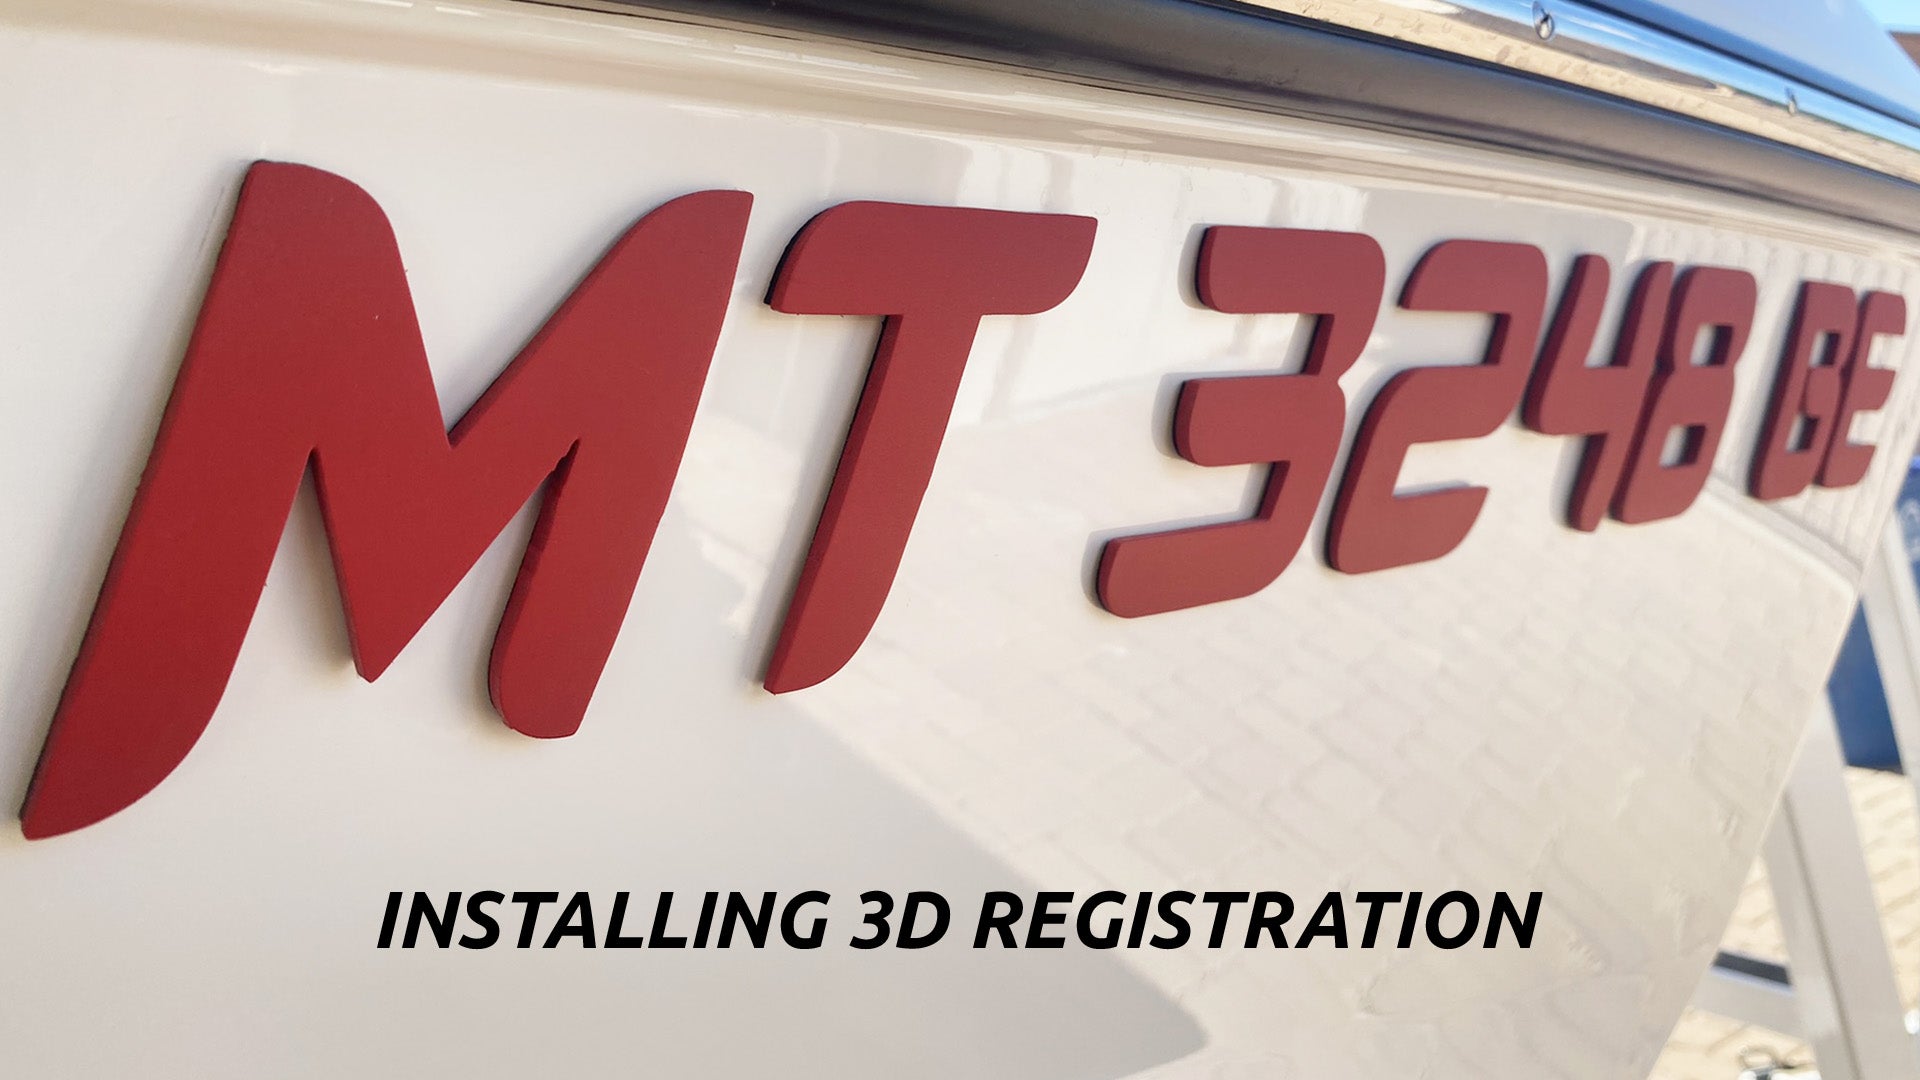
Installing 3D Registration
Watch this short video on how easy it is to install your new 3D Registration Numbers

Installing Domed Registration
Watch this short video on how easy it is to install your new Domed Registration Numbers
Installing Registration Step by Step
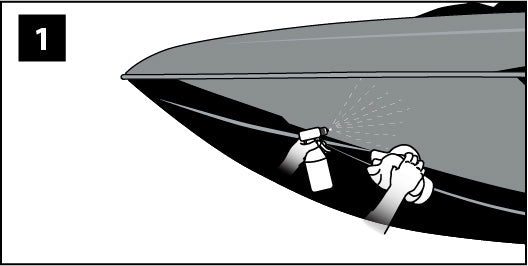
Step 1
Clean and wipe the surface, removing dust and any obvious contaminants.
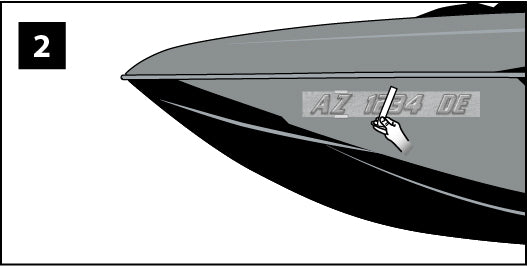
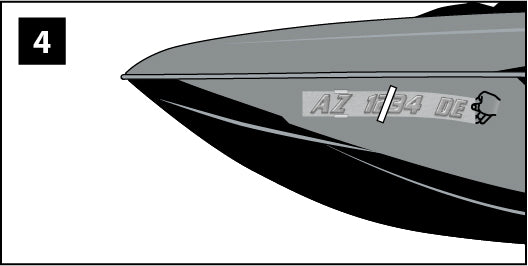
Step 2
Align the graphic on the surface, and tape it in place as shown. Place a long strip of masking tape as shown.
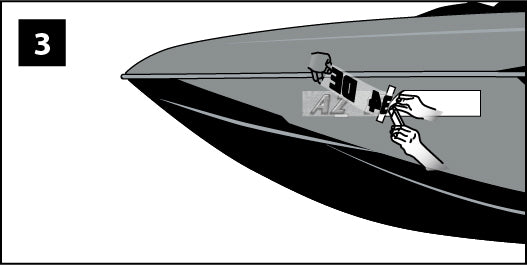
Step 3
Pull the film away from the liner all the way to the long strip of tape. Carefully cut off the liner.
Step 4
Allow the part of the graphic near the center tape to lie against the surface. Gently hold the rest of the graphic away from the surface.

Step 5
Begin at the center and stroke up.
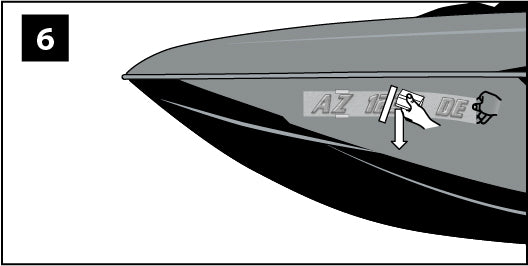
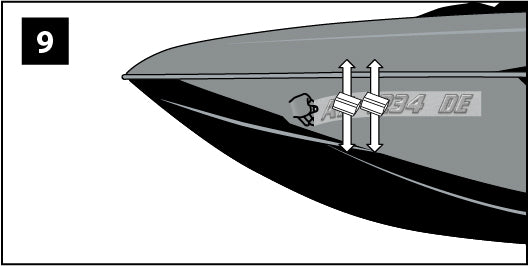
Step 6
Return to the center, and stroke down.
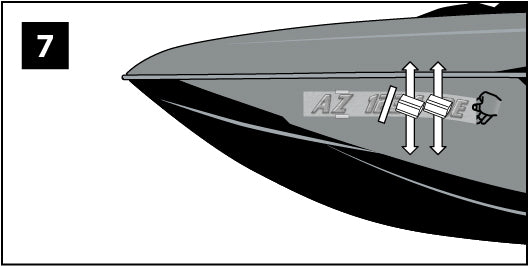
Step 7
Move the squeegee about two inches right. Repeat steps 6 and 7 accross the graphic, allowing more of the graphic to lay against the surface as you work right.
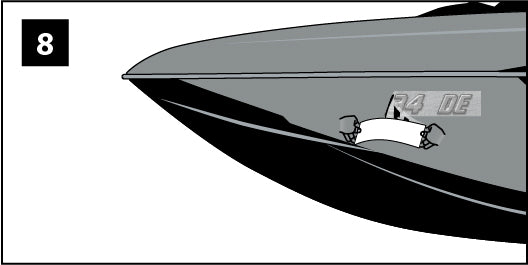
Step 8
Remove the remaining masking tape. Lift the left side of the film and remove the remaining liner.
Step 9
Repeat steps 5, 6 and 7 accross the other side of the graphic.
Step 10
Re-stroke the outer 3 inches of the entire graphic to ensure good edge adhesion and remove the transfer tape. Allow 24-48 hours for the adhesive to completely setup.
Tips and Tricks
Preparation and Cleaning
Clean Surface: Use rubbing alcohol to remove grease, wax, or dirt for maximum adhesion.
Dry Thoroughly: Ensure the surface is completely dry; moisture can compromise the adhesive.
Avoid Windex: Do not use ammonia-based cleaners like Windex, as they can damage the adhesive.
Key Temperature Considerations
Surface Temperature Matters: The temperature of the boat surface is more important than the air temperature. If it is too cold, use a heat gun or bring the vehicle/item into a warm space for 24–48 hours.
Too Cold (< 50°F): Adhesive loses its tack, and vinyl becomes rigid, risking cracking or failure.
Too Hot (> 90°F): Vinyl becomes too soft, leading to stretching, distortion, and potential adhesive residue.
Humidity: Avoid high humidity or condensation, as moisture prevents proper bonding.
Tips for Non-Ideal Conditions
Cold Weather: Use a heat gun or torch to warm the surface, or park in direct sunlight to raise the surface temperature.
Hot Weather: Work in the shade or early in the morning to prevent the vinyl from becoming too soft.
Storage: Allow vinyl to reach room temperature (at least 65°F) for several hours if it has been stored in extreme conditions before application.
After install, let the decals sit for 24 hrs before moving the boat. This allows the adhesive to expand and retract and fully bond to the surface.